

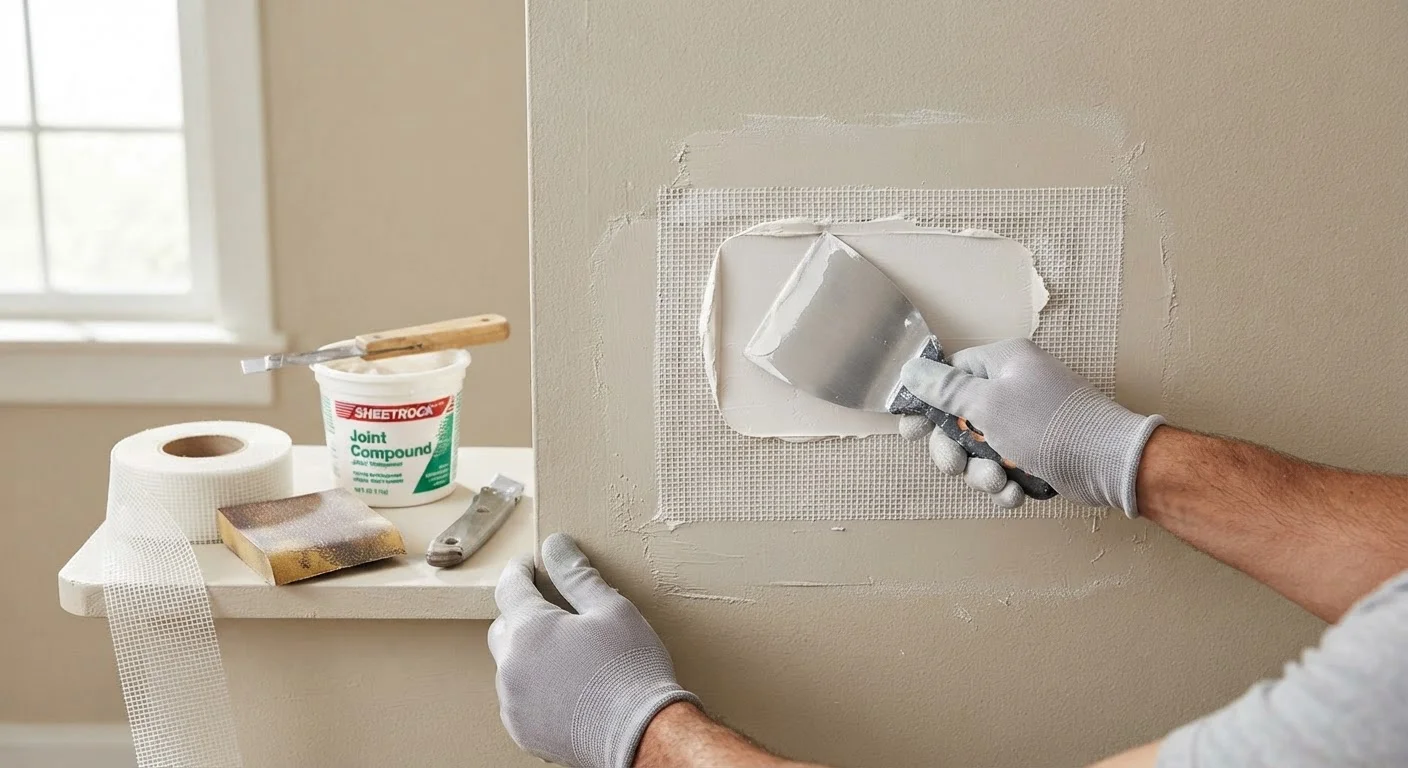
What Makes Drywall Repair DIY-Friendly
Drywall — also called gypsum board or wallboard — is one of the most forgiving materials in residential construction when it comes to minor repairs. Unlike tile, plaster, or wood paneling, small sections can be patched without special training, and the materials cost relatively little. A typical mesh patch kit, a small tub of joint compound, and basic hand tools are all most homeowners need to address the kind of damage that accumulates from everyday living: doorknob dents, anchor holes from picture frames, or dings from moving furniture.
That said, knowing the limits of DIY work matters just as much as knowing the technique. Holes larger than about 6 inches, damage near electrical panels or plumbing, or repairs that involve cutting into walls to investigate structural issues move into different territory. If your project involves anything structural, read our guide to identifying load-bearing walls before proceeding. And for a broader look at where the DIY line is drawn, see when a repair requires a licensed contractor.
Check for Hidden Wiring or Plumbing First
Before cutting or enlarging any hole in drywall, use a stud finder with AC detection or a non-contact voltage tester to check for electrical wires behind the wall. Pipes can also run through wall cavities, particularly in bathrooms and kitchens. Cutting into a live wire or pipe is dangerous and expensive — if you have any doubt, stop and consult a qualified electrician or plumber.
With those boundaries in mind, the steps below walk through the most common drywall repair scenarios from assessment through final paint.
What you will need
Tools and Materials You'll Need
Most of these items are available at any hardware or home improvement store. For small holes, you may already have some on hand. Resist the temptation to purchase texture spray as a shortcut for textured walls — it is difficult to match precisely, and hand-applied texture typically blends better.
Self-adhesive mesh patch kit
Covers small to medium holes and provides a surface for joint compound to adhere to.
Putty knife or drywall knife (4–6 inch)
Used to apply and smooth joint compound over the patch.
All-purpose joint compound (pre-mixed)
Fills and levels the patched area flush with the surrounding wall surface.
120- and 220-grit sandpaper
Smooths dried joint compound so the patch blends seamlessly into the wall.
Backer board or California patch (for larger holes)
Provides structural support behind holes too large for a mesh patch alone.
Drywall screws and screw gun
Secures a backer board inside the wall cavity for medium-sized hole repairs.
Primer
Seals the repaired area so paint adheres evenly and the patch does not show through.
Matching wall paint
Finishes the repair so it blends visually with the rest of the wall.
Step-by-Step Patching Instructions
Follow these steps in order. The most important variable in drywall repair is patience — specifically, allowing each coat of compound to dry fully before moving on. A repair rushed through drying stages will crack, shrink, or show clearly under paint.
Assess the damage and choose your method
Size determines your approach. Nail holes and small dings (under ½ inch) need only a dab of spackling compound or lightweight joint compound — no patch required. Holes from doorknob strikes or anchors (½ inch to 4 inches) are ideal for self-adhesive mesh patch kits. Larger holes up to about 6 inches across require a backer board and a cut drywall piece for a lasting repair.
Prepare the damaged area
Remove any loose paper, crumbled drywall, or protruding screw anchors from around the hole. Use a utility knife to trim jagged edges so the perimeter is as clean as possible. Wipe the surrounding area with a slightly damp cloth to remove dust and grease, which can prevent compound from bonding properly.
Apply the mesh patch (for small to medium holes)
Peel the backing from the self-adhesive mesh patch and center it over the hole, pressing it firmly to the wall. The mesh should overlap the hole edges by at least an inch on all sides. For larger holes requiring a backer board, cut a piece of ½-inch drywall slightly larger than the hole, attach a backer board (a strip of wood or metal) to the inside edges of the opening with screws, then screw the drywall patch piece to the backer board.
Apply the first coat of joint compound
Using your putty knife, spread a thin, even layer of pre-mixed all-purpose joint compound over the patch, pressing it into the mesh and feathering the edges outward 2–3 inches beyond the patch perimeter. The goal at this stage is coverage and adhesion, not perfection. The compound will appear white when wet and turn a uniform white-gray when fully dry.
Sand, then apply a second (and possibly third) coat
Once the first coat is completely dry — typically 24 hours, though humidity affects drying time — lightly sand it with 120-grit sandpaper. Wipe away dust, then apply a second thin coat, extending the feathered edges even further for a gradual transition. For a flawless finish, a third coat may be needed. Each coat should be thinner and wider than the previous one.
[tip_callout]Final sand, prime, and paint
Once the final coat is dry, sand the entire area smooth with 220-grit sandpaper. Run your hand across the surface — it should feel flush with the surrounding wall. Apply a coat of primer before painting; skipping primer often causes the patch to appear as a dull spot even after painting. Finish with your matching wall paint, using the same application method (roller or brush) as the original wall texture.
Older Homes May Contain Asbestos or Lead
Drywall and joint compound in homes built before the mid-1980s may contain hazardous materials. If your home is older and you are unsure of its history, have the material tested by a certified inspector before sanding or disturbing it. Sanding releases fine particles that can be dangerous if inhaled.
Common Mistakes and How to Avoid Them
Even straightforward drywall patches can go wrong in predictable ways. Here are the most frequent issues and how to sidestep them:
- Applying compound too thick: Thick applications crack as they dry and take far longer. Two to three thin coats always outperform one heavy coat.
- Not feathering the edges: A patch that ends abruptly creates a visible ridge under paint. Extend each coat further than the last, blending gradually into the undamaged wall.
- Skipping primer: Joint compound is porous and absorbs paint differently than cured drywall. Without primer, the patched area will look flat or slightly different in sheen even after painting.
- Mismatched texture: If your walls have texture and you paint over a smooth patch, the difference will be obvious in certain lighting. Recreate the texture before priming.
- Inadequate surface prep: Loose edges, grease, or dust around the hole prevent compound from bonding, leading to peeling over time.
Taking an extra half hour to do prep and finish work correctly pays off in a repair that genuinely disappears into the wall.
The content on this site is for informational purposes only and is not a substitute for professional advice. Always consult a qualified professional for guidance specific to your situation.